Quick Tip : Create & Deploy Azure SQL Server Instance | Step by Step
Pre-requisites Steps:
- Azure account with an active subscription. Create an account for free
- Create Resource Group
Step 1: Click on “All services”
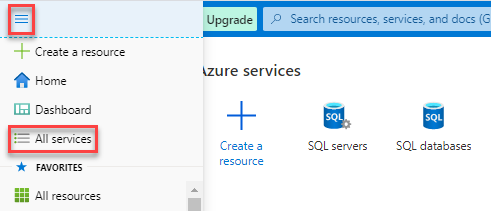
Step 2: Select “SQL servers” from the market place

Step 3: Click on “Add” link

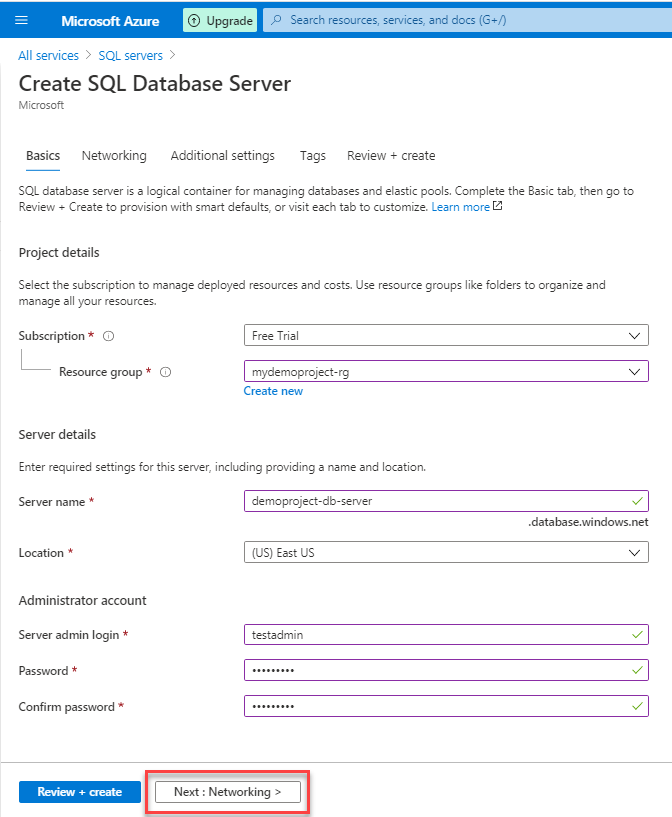
Step 4: Fill out Server details such as name & its credentials, then click “Next”
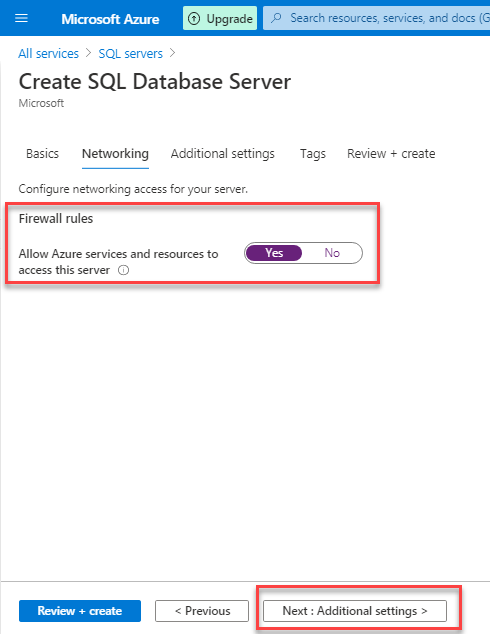
Step 5: Select “Yes” to allow the services & resources to access this server, then click “Next”
Step 6: Keep “Additional settings” as default

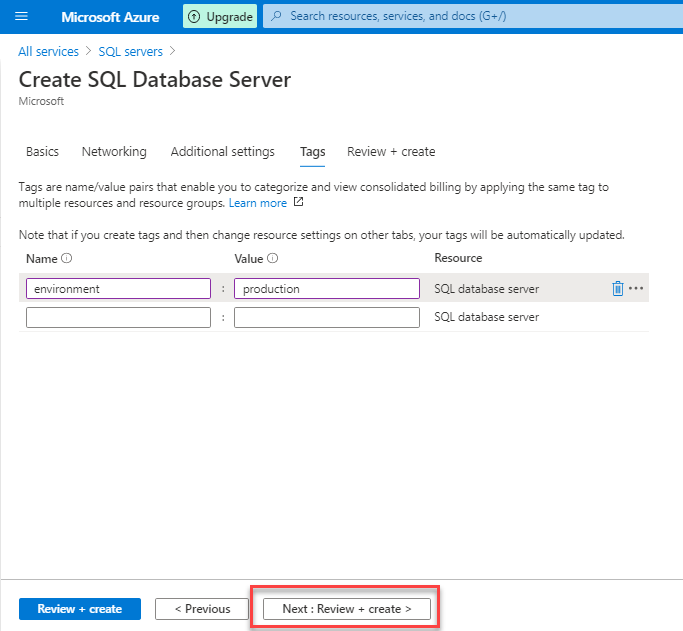
Step 7: Add relevant “Tags”
Step 8: Review the summary details, then click on “Create”

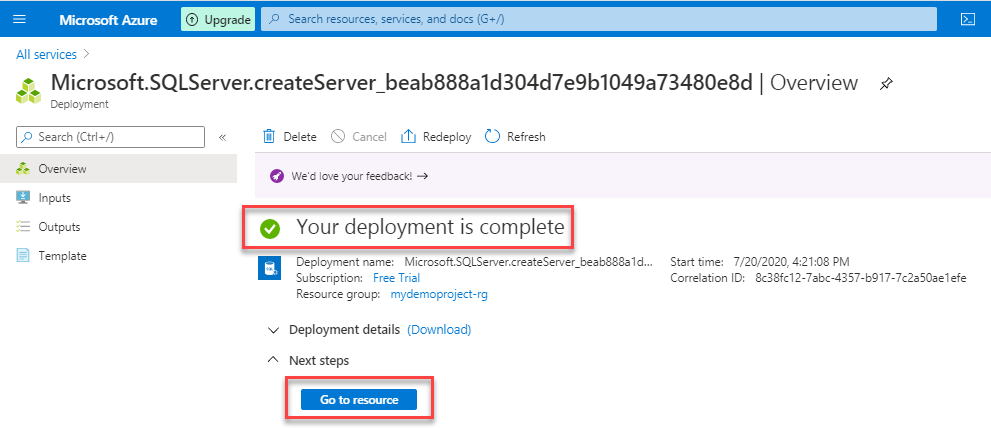
Step 9: Once the deployment completed, then click on “Go to resource”
Step 10: Now the SQL Server instance created & running
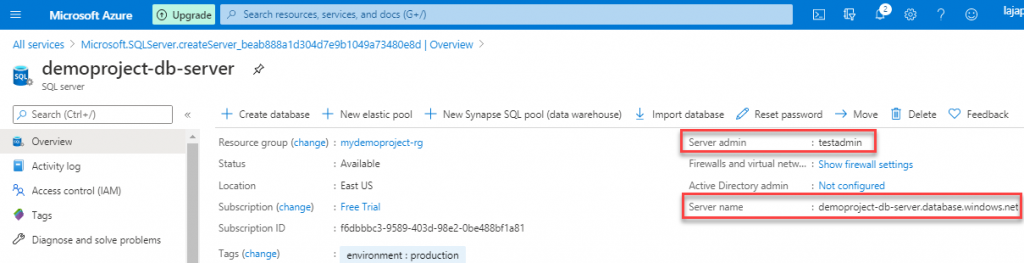
Step 11: Now you can connect SQL Server instance via SQL Server Management Studio & also via Azure portal Query Editor by picking the server details from the previous step
Next Steps
Do you still have any questions about this article, Ask away in the comments and we’ll do our best to help!