Quick Tip : Scaling Up/Down in Azure App Service via Azure portal | Step By Step
In this blog, we are going to learn “Scaling Up/Down in Azure App Service via Azure portal”.
Introduction:
Get more CPU, memory, disk space, and extra features like dedicated virtual machines (VMs), custom domains and certificates, staging slots, autoscaling, and more. You scale up by changing the pricing tier of the App Service plan that your app belongs to.
Pre-requisites Steps:
- Azure account with an active subscription. Create an account for free
- Quick Tip : How to view specific App Service via Azure Portal | Step by Step
Dependency Resources:
- Resource Group
- App Service
Step by Step:
Step 0: Go through the Pre-requisites
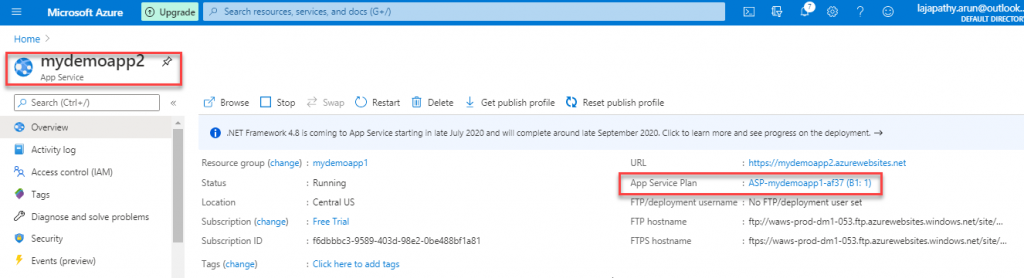
Step 1: Login into Azure Portal, then Navigate to your App Service
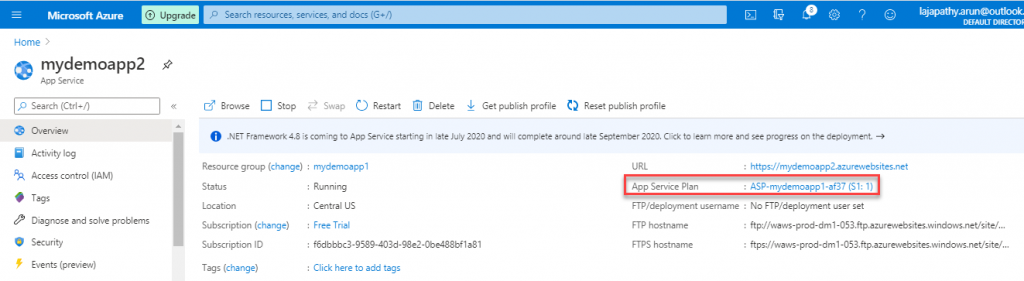
Step 2: Just make a note of App Service plan highlighed below, Now we are going to Scale Up from basic plan to standard
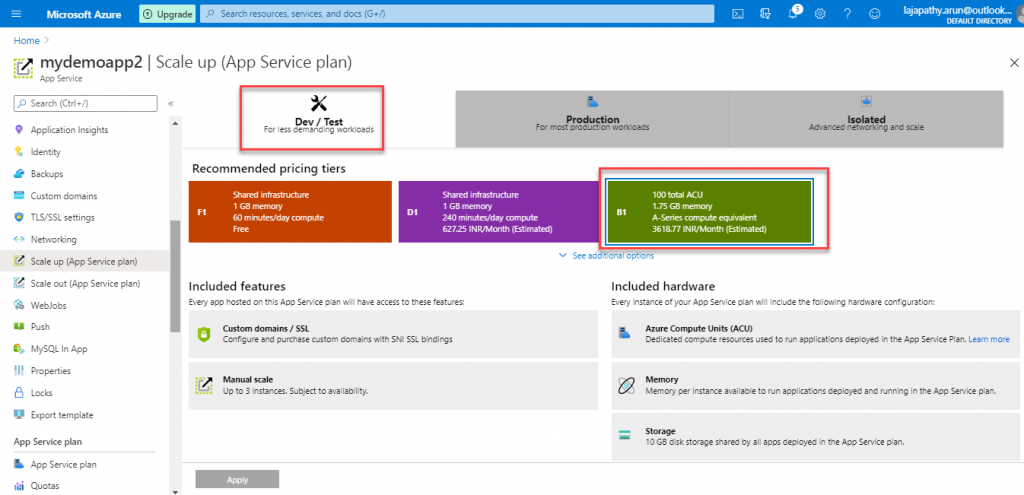
Step 3: Click on Scale Up in the left blade, Check out the active plan
Step 4: Now change to higher plan to scale up, then click on “Apply”
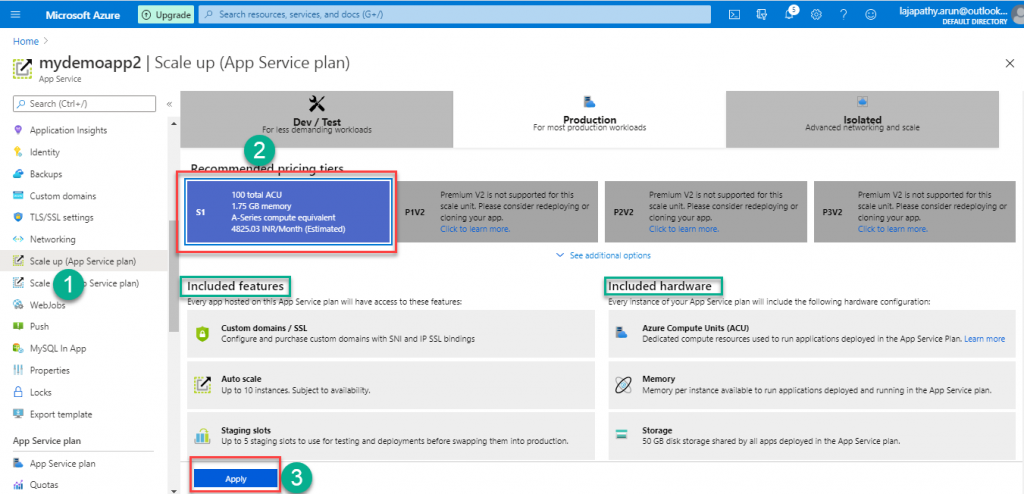
Step 5: Finally checkout the App Service plan get changed to Standard Plan(S1)
Step 6: You can follow the above steps to Scale Down the App Service
Do you still have any questions about this article, ask away in the comments and we’ll do our best to help!
HAPPY LEARNING 🙂


Hi,
Do you know how to set up Automation scale in and out SQL server?
Hope this link helps,
https://wikipassion.com/microsoft-azure/quick-tip-scaling-up-down-azure-sql-database-via-azure-portal-step-by-step/
I am often to blogging and i really appreciate your content. The article has really peaks my interest. I am going to bookmark your site and keep checking for new information.
I value the blog.Really thank you! Really Cool.