Step-by-Step: How to Cleanup Specific Resources from your Resource Group via Azure Portal?
In this article, you’ll learn How to Cleanup Specific Resources from your Resource Group via Azure Portal.
Pre-requisites:
- Azure account with an active subscription. Create an account for free
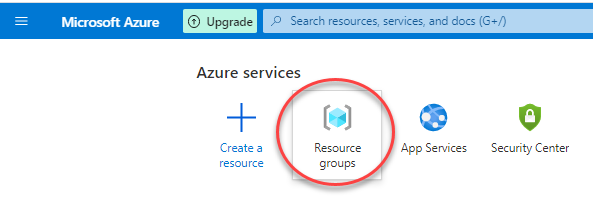
Step 1 – Login into Azure portal, then click on “Resource groups“
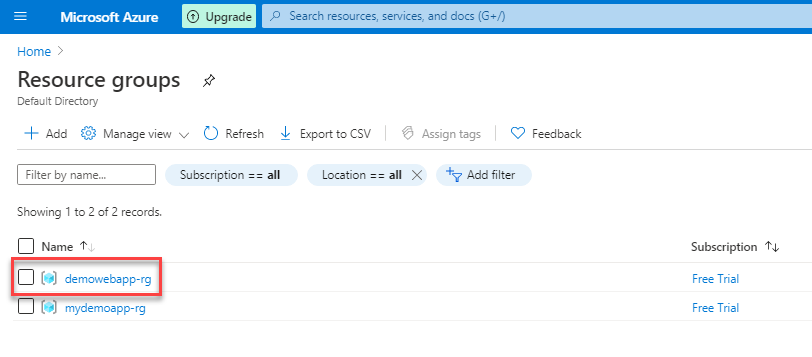
Step 2 – Click on your resource group
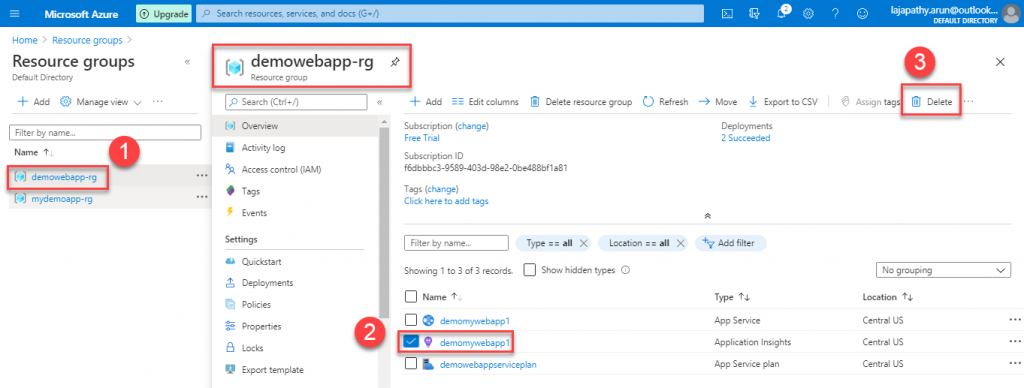
Step 3 – Click on specific checkbox to select your resources in step 2 below, then click on “Delete”
Step 4 – Type “yes” to confirm, then click on “Delete”

Step 5 – Now, the selected resources are deleted, click on “Refresh” if you still see the deleted resources

In this article, you’ll learn How to Cleanup Specific Resources from your Resource Group via Azure Portal.
Congratulations! You have Deleted your Specific Resources successfully.