Step-by-Step : How to Create your Resource Group via Azure Portal?
In this article, you’ll learn How to Create your Resource Group via Azure Portal.
Pre-requisites:
- Azure account with an active subscription. Create an account for free
Step 1 – Login into Azure portal, then click on “Resource Groups”

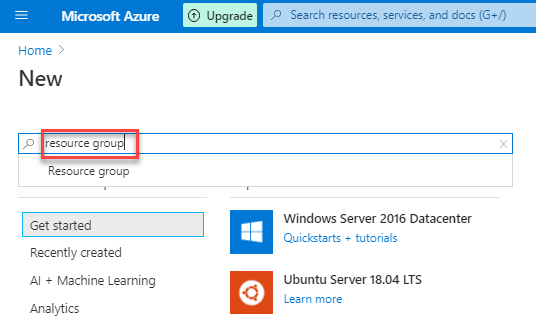
Step 2 – Search for and select “resource group”
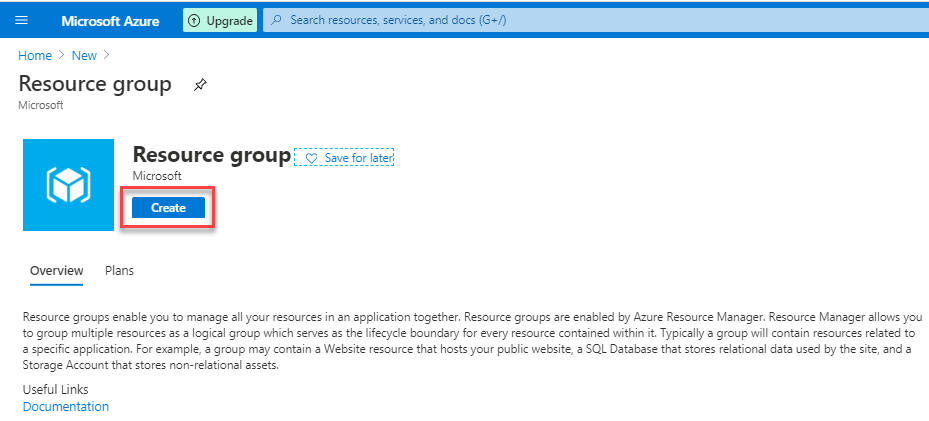
Step 3 – Click on “Create”
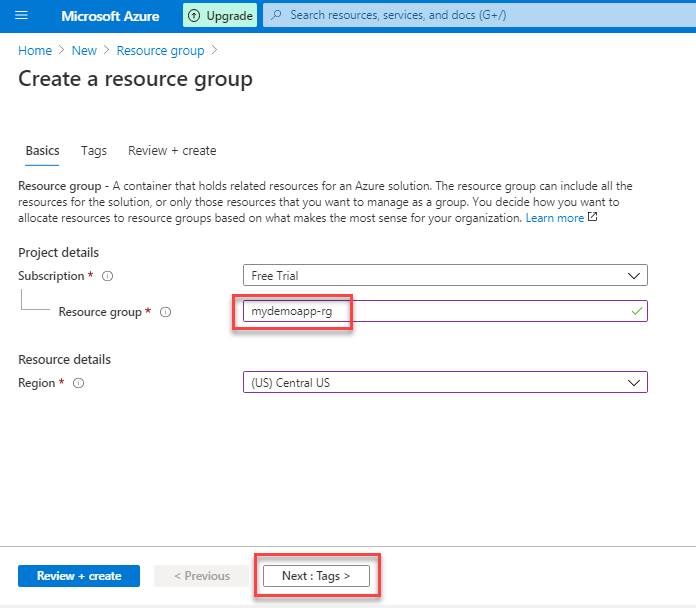
Step 3 – Enter the Resource group Name. then click on “Next”
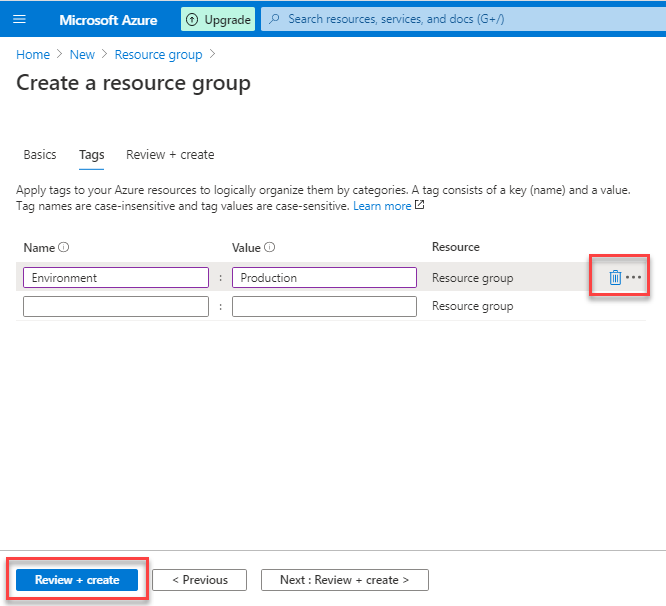
Step 4 – Enter the Tags, it is optional, then click on “Review + Create”
Step 5 – Once the Validation passed, then click on “Create”

Step 6 – Resource Group Creation in-progress

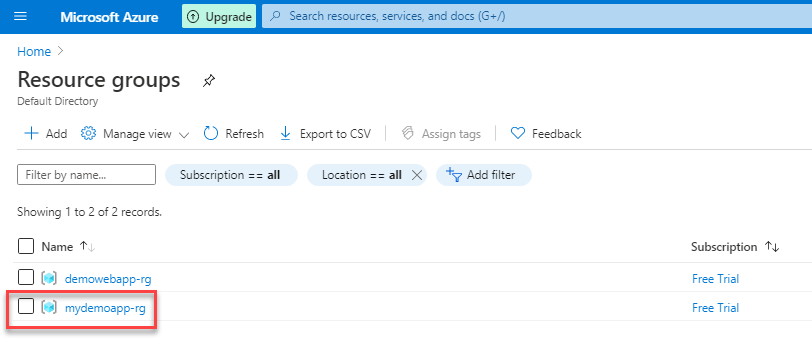
Step 7 – Once Created, Now it redirects to “Resource groups” page. Here you can see your new Resource group below.
Congratulations! You have Created your Resource Group successfully.
Now, you have learned How to Create your Resource Group via Azure Portal.