Quick Tip : Create & Deploy Azure SQL Database | Step by Step
In this blog, we are going to learn “How to get Connection String in Azure SQL Database”.
Pre-requisites Steps:
- Azure account with an active subscription. Create an account for free
- Create Resource Group
- Create & Deploy SQL Server Instance
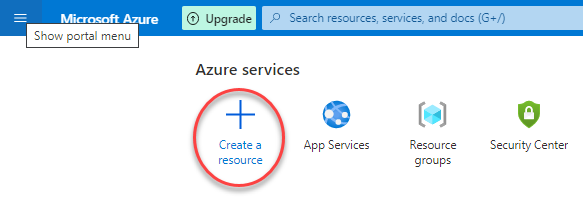
Step 1: Click on “Create a resource”
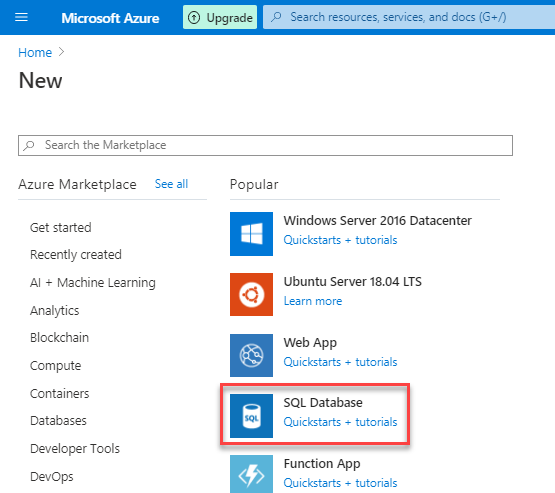
Step 2: Select “SQL database” in the market place
Step 3: Fillout the database details like database name, select “Server” resource & keep others as default, then click “Next”

Step 4: Keep the default “Networking” configuration, then click “Next”

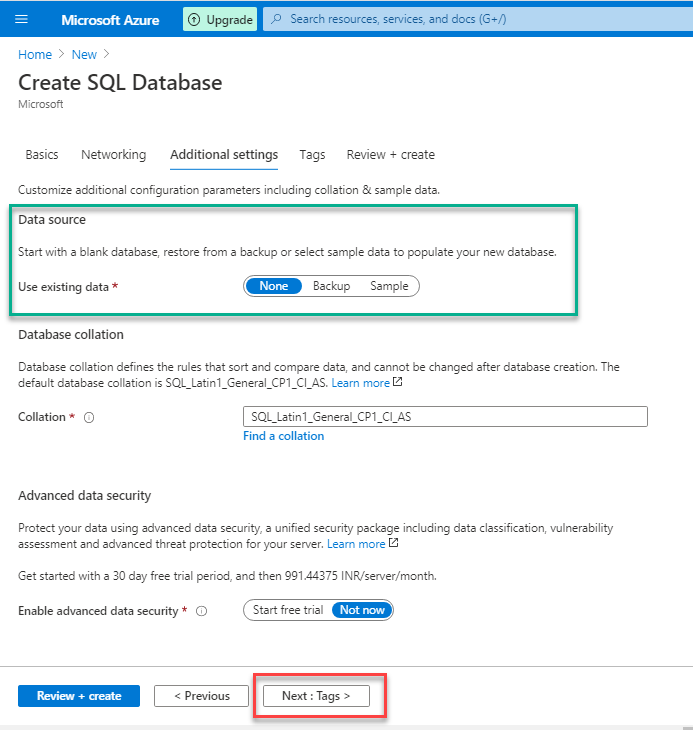
Step 5 : Select the datasource as “None” to create a empty database & keep other options as default, then click “Next”
Step 6: Add the required “Tags”, then click “Next”

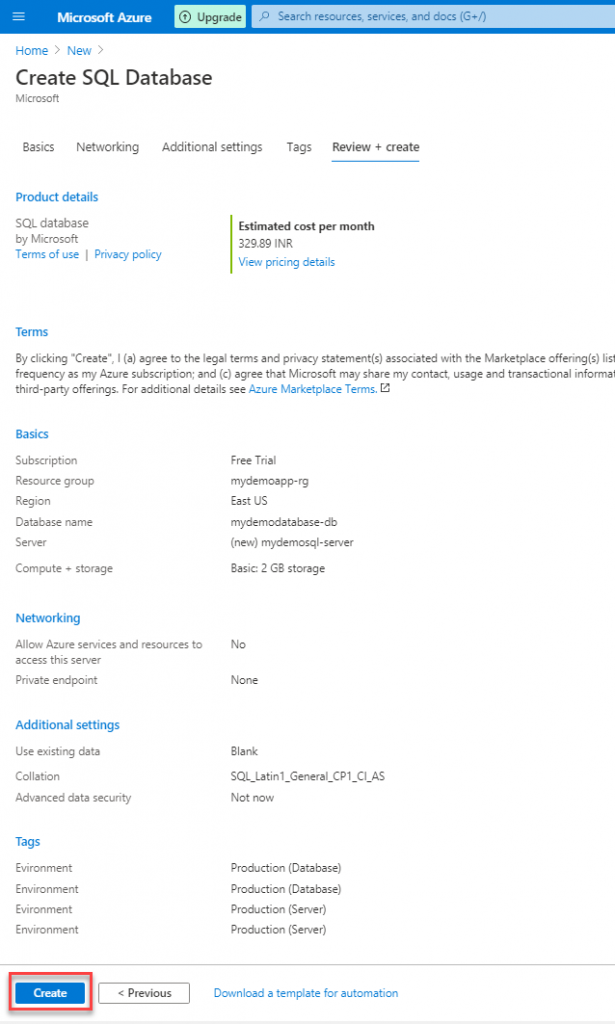
Step 7: Now, review the summary, then click on “Create”
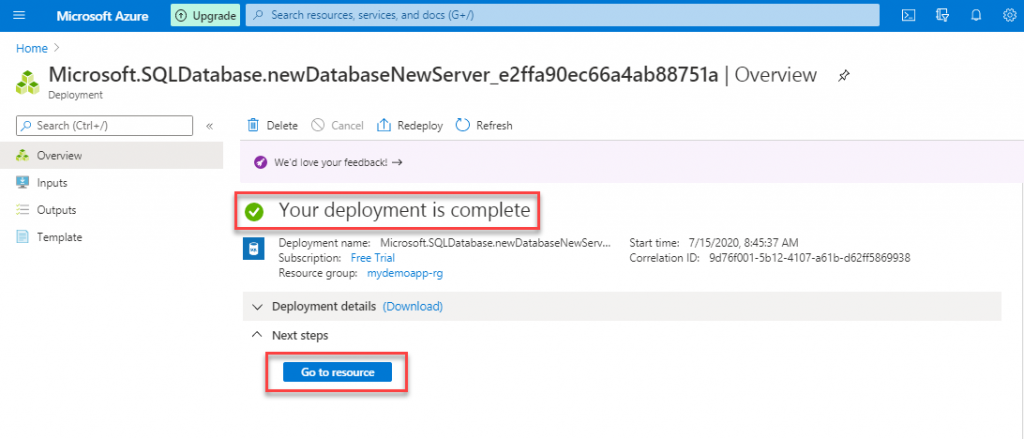
Step 8: Once the deployment is completed, then click on “Create a resource”
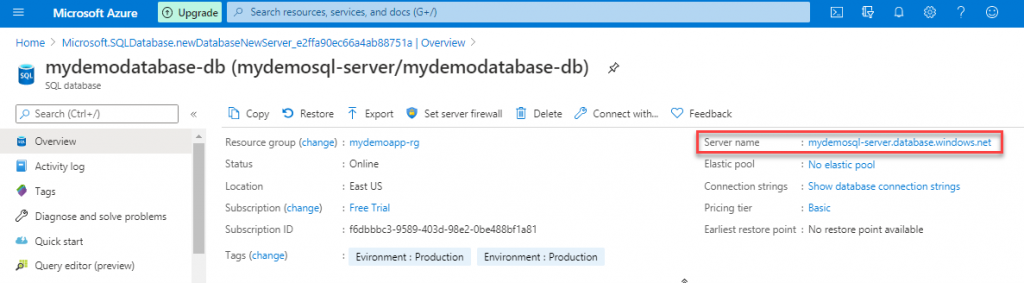
Step 9: Pick the server name (endpoint) shown below, then also pick the “server” instance credentials
Do you still have any questions about this article, Ask away in the comments and we’ll do our best to help!