Quick Tip : How to Create Storage Account via Azure portal | Step By Step
In this blog, we are going to see “How to Create Storage via Azure portal”.
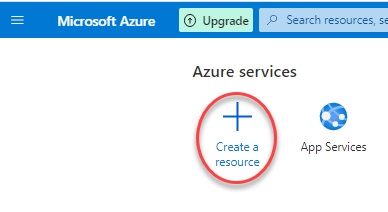
Step 1: Click on “Create a resource”
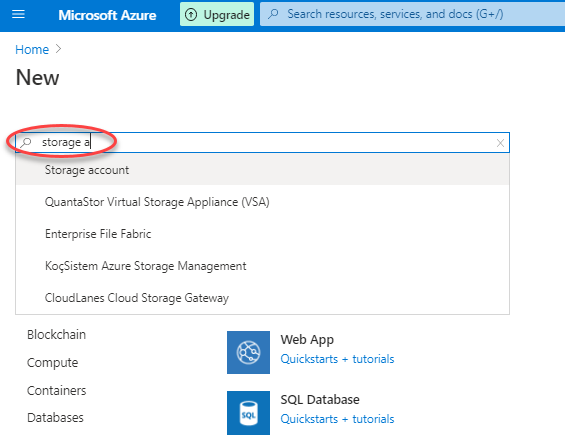
Step 2: Search & Select “Storage Account”
Step 3: Click on “Create”

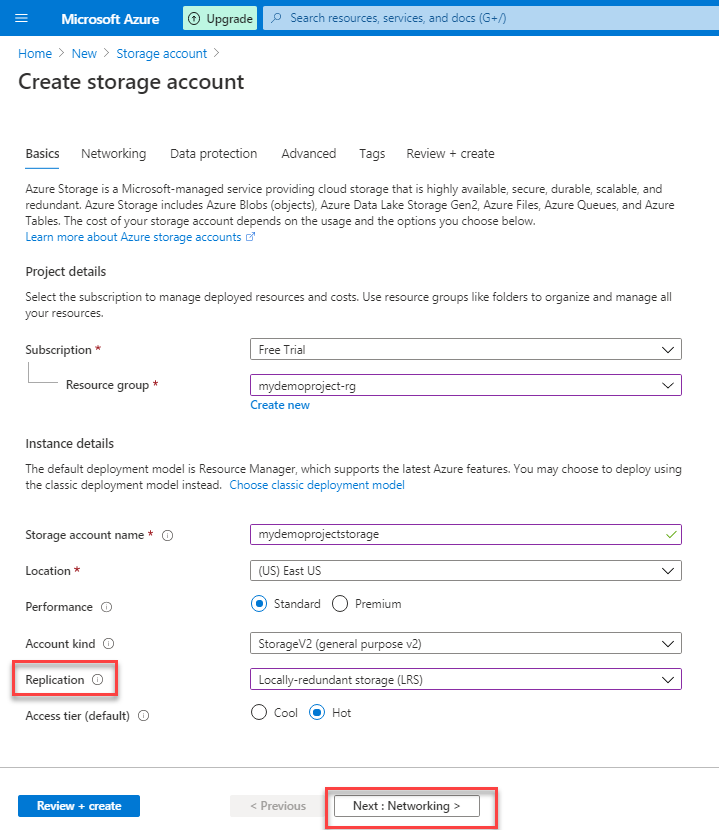
Step 4: Fillout Project Details, Instance Details , then click “Next”.
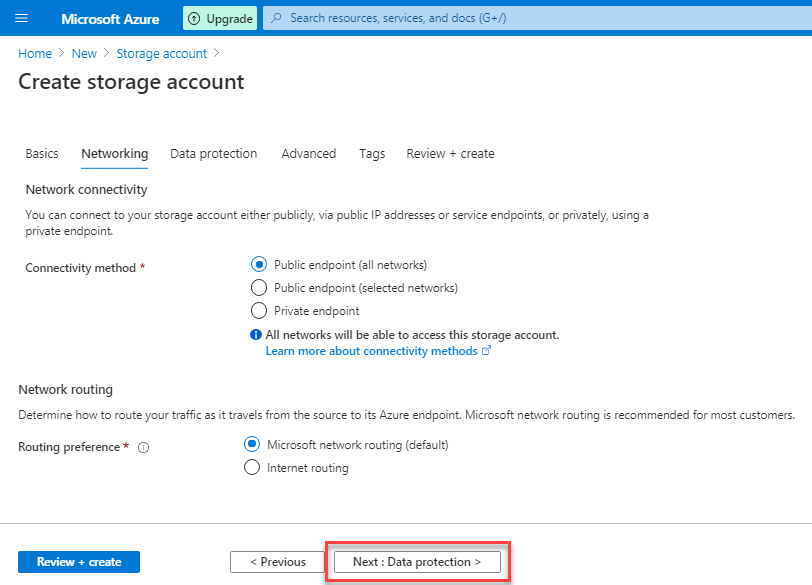
Step 5: Leave the Network settings as default, then click “Next”
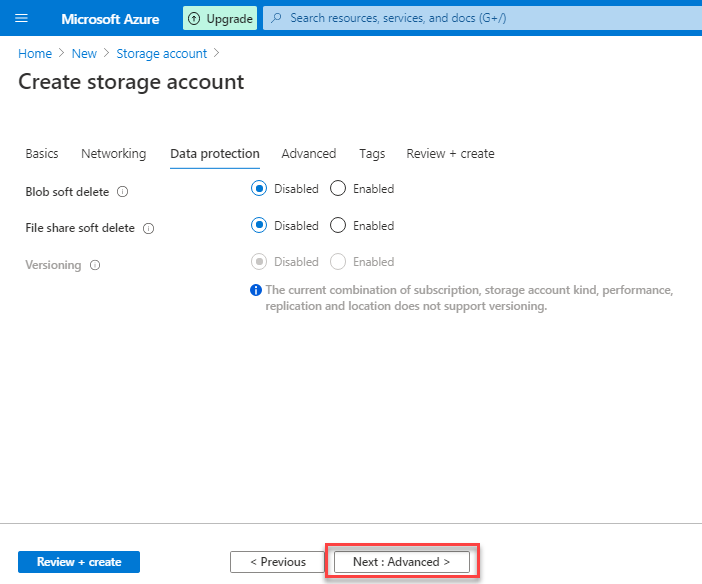
Step 6: Leave the Data Protection Settings as default, then click “Next”
Step 7: Leave the Advanced settings as default, then click “Next”

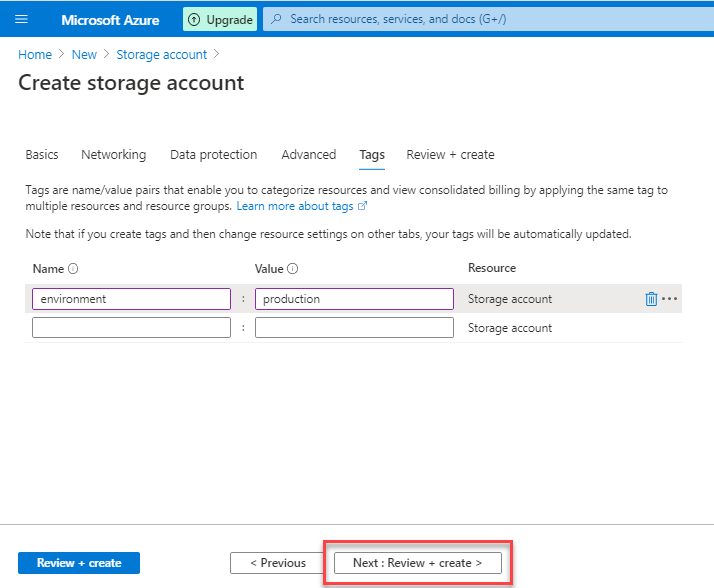
Step 8: Fill out some tags, then click “Next”
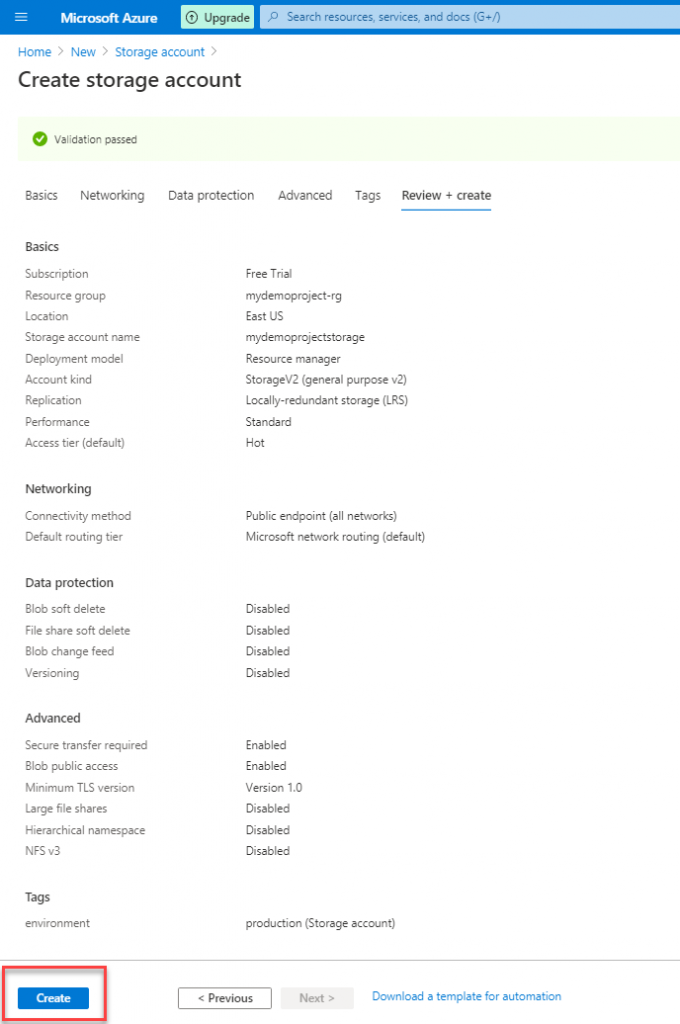
Step 9: Review the Summary details, then click on “Create”
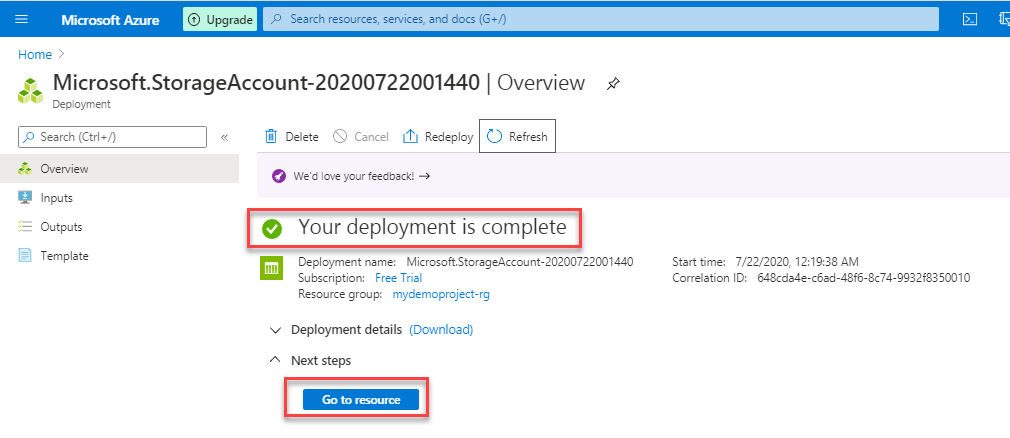
Step 10: Once the deployment is completed, click on “Go to resource”
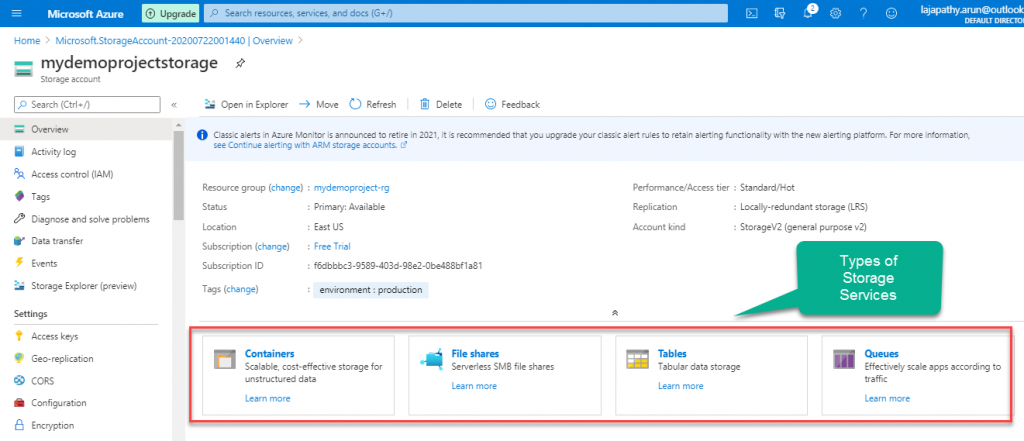
Step 11: Here you can see the “Storage Account” is created, Now you can create different storage services such as container, File shares Tables, Queues
Do you still have any questions about this article, ask away in the comments and we’ll do our best to help!