Quick Tip : How to Create Storage Container in Storage Account via Azure portal | Step By Step
In this blog, we are going to learn “How to Create Storage Container in Storage Account via Azure portal”.
Pre-requisites Steps:
- Azure account with an active subscription. Create an account for free
- Quick Tip : How to Create Storage Account via Azure portal
Step 0: Go through the Pre-requisites
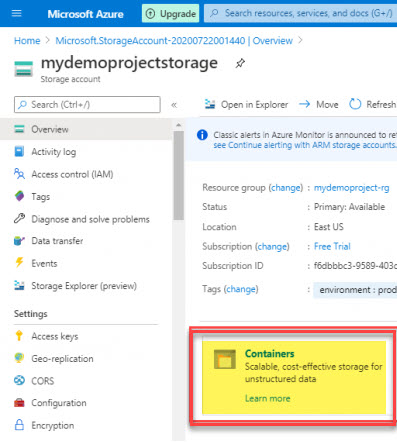
Step 1: Create a Storage Account & Navigate to your Storage Account page
Step 2: Click on “Container” Storage service
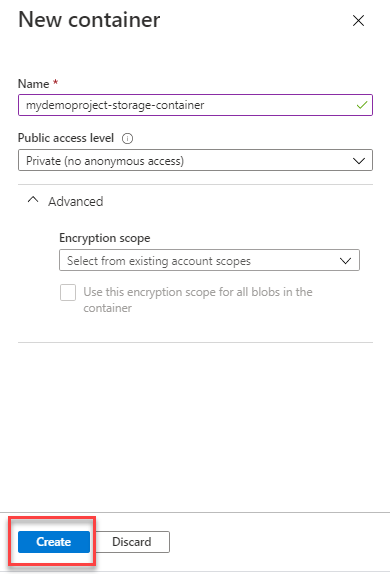
Step 3: Click on “Container” button

Step 4: Fillout container name & keep others as default, then click on “Create”
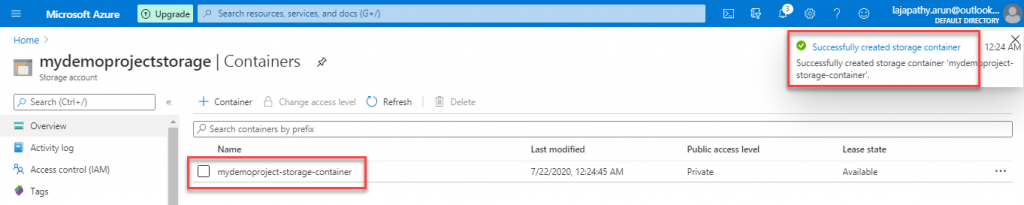
Step 5: Now the container created under storage account, then click on container name shown below
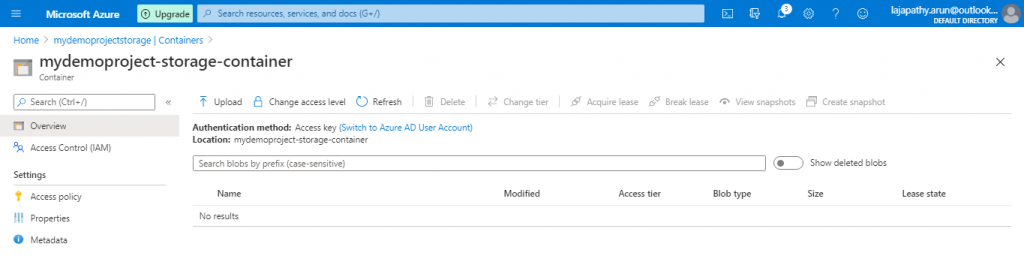
Step 6: Now you are navigated to storage container page, here you can manage & secure blob objects.
Do you still have any questions about this article, ask away in the comments and we’ll do our best to help!